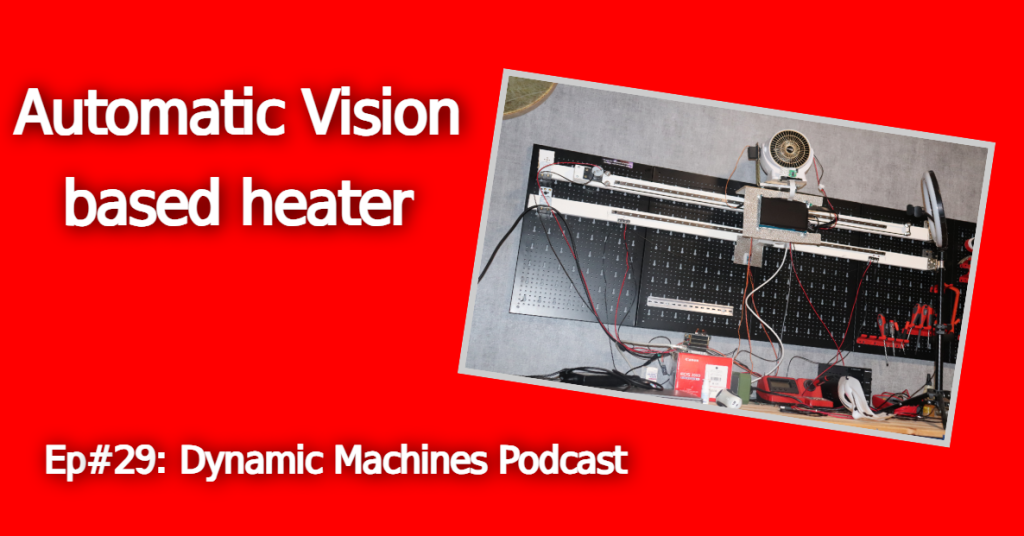
I had this Idea to control this heater with just using Vision in order to find the right position to focus the heat on the person inside the room. I have used four different raspberry pi to be used as Server and also Live-Camera in order to communicate with my laptop which acts as a client. All of this comunication is happening over OPCUA and The cllient trigers the functions witten on the Server Side. But Before going fürther i would like show you the topology and the components used in this project:

Topology of the System
The list of the components:
1- Dlink 1000 MB/s- Unmanaged Switch
2- 2x-Raspberry pi3- Camera
3- 1X-Raspberry pi3- Server
4- 1X-Adafruit – DC motor HAT
5- 1X-Adafruit – Servo Motor HAT
6- 1X- Geeekpi Raspberry pi GPIO HAT
7- 1X -Geeekpi Raspberry pi Relay Channel
8- 4X- Raspberry pi Power Supply
9- 1X -Electrical Heater 1500 W
10- 1X- DC motor 9V
11- 2X- Servo motor 6V
12- 1X- Screen 7 Inch
Step1: I have downloaded Pycharm as the platform to run Python on my Laptop. Ofcourse i had to download a lot of Libraries and packages in order to do image processing. The most well known is OpenCV which has powerfull library for different image recognitions tasks.
Step2: Adjusting all the required settings on Raspberrypi such as installation the Debian as the operating system, Activating the required I2C Connection and GPIO on the Raspberry pi and So on.
Step3: Installing Adafruit PythonCircuit Library on Debian and letting your Raspberry pi to comminucate with The HATs that control either Servo Motors or DC motors or Just playing as a Relay.
Step4: Installing OPCUA on the client side which is my Laptop and seting up the Sharing the Variable on the Root of the python program (on my Laptop) to be read and write from the Server (from opcua import client). You can use Uaexpert to deal with this issue. You need to add your Raspberypi IP address or Name ID on the Uaexpert in order to be able to set up your Server. From the Server side you also need to define the OPCUA package on the Raspberry pi in python (from opcua import server ).
Step5: Writing the Image recognition code on the client side in python and also writing the Sesnor and actuator code in Python on Server side is the next steps. You have to be careful that writing too many If condition can make your Server slowler on Raspberry pi and therefor you might experience Lagging on Performance and communication between Server and Client
Step6: Connecting the ethernet cables to the switch and specifiying IP address for each module. Remember to remain in the same IP Layer for all components in the network. If you activate DHCP on your wifi modem and connect it to your switch as well, it can automatically give each component a random IP address but in the same subnet.
Step7: Connecting and running the other raspberry pi to the network in order to use their camera as a live-cam. Its recommended to transfer the images from the camera over http protocol instead of rtsp due to the lag
Step8: Calibrating the camera field of view in the python code and definition of the calibrated field of view to the server side for proper allocation and positioning the heater in the right place.
Step9: Testing if the system works!

Donation
Please help me to make new videos by your generous donation!
€3.00


Leave a comment